The bounty of summer’s gardens and fall’s harvest quickly diminishes as the winter rolls on. This often leaves us with one option: a trip to the grocery store.
And while the produce appears clean and crisp, in many cases it has been shipped from far-off places, losing valuable nutrients during transport and gaining an extra coat or two of pesticides and preservatives. So rather than settling for the often-limp, frozen variety of organic produce to make up your veggie servings during the winter, opt instead for a serving of the sprouted variety.
What is sprouting?
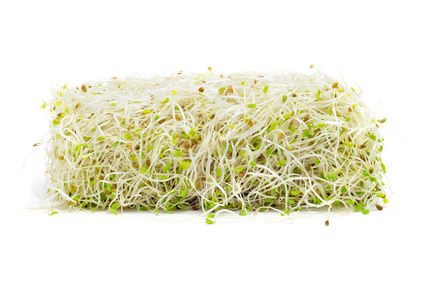
Sprouts are simply the very beginning growths from a seed. When the dormant seed begins to “hatch,” so to speak, it begins activating many metabolic systems that eventually help form the first green buds. If this seed were planted, the sprout would be the very first hint of plantlife emerging through the soil.
When you sprout your own seeds, you don’t plant them, rather you encourage these metabolic pathways to begin activation by keeping them moist in a soil-free environment. Once the seed sprouts its first buds, they are ready to eat.
Why sprout?
You may ask what the benefit is of eating such an immature plant. When seeds prepare to sprout, they unleash a wealth of nutrients into those first buds. The buds, or sprouts, contain high levels of absorbable protein and increased amounts of nutrients like calcium, potassium, iron and vitamins A, B1, B2, B3 and C, as well as some of the highest levels of antioxidants around. As the plant continues to grow, these concentrations begin to dwindle.
In essence, the sprouts contain the highest concentrations of all the plant’s nutrients needed for full growth. Sprouting is also inexpensive, and unsprouted seeds can be purchased and stored for a long period of time.
Sprouted grains also contain less starch and gluten than their mature counterparts, making them useful in controlling blood sugar, and a better option for those with a gluten sensitivity.
How to sprout
Sprouting your own seeds is quite easy. Practically any seed can be sprouted, but the more popular varieties are alfalfa, mung bean, garbanzo bean, lentil, pumpkin and red clover. The main importance is that you look to purchase organic “sprouting seeds.” These have been properly cleaned, whereas non-sprouting seeds may contain pathogens or bacteria on their coatings.
Many health food stores sell sprouting kits which may be good for first-timers, but you can be just as successful at sprouting using nothing more than a canning jar and a screen. Just follow these simple steps:
- Rinse and soak your seeds overnight at room temperature in a bowl of clean, non-chlorinated water.
- The next morning, dump the water, and rinse and place the seeds in a jar with a screen over the lid. The seeds should still remain moist but not covered in water.
- Repeat this process once or twice daily to keep the seeds from molding as they begin to sprout. Pour the water through the screen to rinse the seeds. Allow the jar to sit upside down at an angle so the water can continuously drain. Within a few days you will begin to see the early blooms.
 As the sprouts grow and turn green, they are ready to eat. This usually occurs within three to five days. Once you are satisfied with their growth, be sure to dry them thoroughly and store them in the refrigerator.
- Sprouts will usually hold for a few days refrigerated, but you will want to consume them early to avoid any bacterial growth.
- Add them to salads, soups, sandwiches and anything you can think of for an added nutritional punch you won’t find in the produce aisle.
-The Alternative Daily
Sources:
http://www.simplebites.net/how-to-grow-sprouts-at-home
http://healthyeating.sfgate.com/benefits-sprouting-seeds-2304.html
http://rawfoodswitch.com/raw-food-equipment-reviews/sprouting-guide-sprout-seeds-bean-sprouts
http://www.whfoods.com/genpage.php?tname=george&dbid=166

