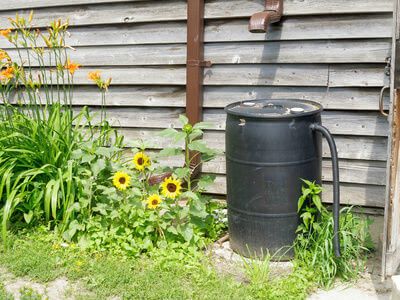
It is so simple that everyone can do it. If you have a roof on your house, you can catch the rain. Although you can purchase rain barrels – you can also make one very inexpensively.
Why Build a Rain Barrel
- It will reduce your water bill because you will no longer need to pay for water for outdoor use.
- It will help reduce the demand on the sewer system.
- It helps to protect the quality of streams and groundwater.
- It puts your roof to use. A 2,500 square foot house can capture around 1500 gallons of water with 1 inch of rainfall.
How to Build a Rain Barrel
Tools needed:
- Drill
- 1 inch spade bit
- Tin snips
- Adjustable wrench
- Utility knife
- Safety glasses
- Hacksaw
Materials Needed:
- One plastic food grade barrel – 55 – 60 gallons
- 3/4 inch hose spigot with locknut
- 3/4 inch hose adapter with lock nut
- Teflon tape
- 2 concrete blocks
- Window screen mesh
- Bungee cord
- Downspout elbow
- Cinching strap with screws
Instructions:
- Open up and wash out your barrel to prepare it for use. Make sure to use a food grade barrel.
- Drill several 1 inch holes in the lid of the barrel to use as the water holes. These are the locations where the water will come into the barrel.
- Drill a 1-inch hole on the front of the barrel 2-inches from the bottom. Drill a second hole on the side of the barrel 2-inches from the top.
- Wrap the threads of the spigot in teflon tape and screw it into the bottom hole and tighten it with a locknut.
- Wrap the threads of the hose adapter in teflon tape and screw it into the top hole and tighten with a lock nut. This will be the overflow. You can attach a short piece of hose to direct the water away from the barrel or simply let it flow out of the adapter.
- Cut a piece of wire mesh to fit slightly larger than the top of the barrel. Wrap the screening over the barrel and then wrap a bungee cord around it to hold it in place. This will keep bugs, and particularly mosquito larvae, out of your barrel.
- Place the concrete blocks side by side below the downspout to serve as a level stand for the barrel. Place the barrel on top of the blocks.
- Cut the downspout off about 12-inches above the top of the rainbarrel. Attach a downspout elbow using a cinching strap so water from the gutter is directed into the barrel. Your rain barrel is now ready for use.
 Tips:
Tips:
- Empty your rain barrel in the late fall if you are in a climate where it freezes
- Put one cup of mouthwash in your rain barrel to keep the mosquitoes away
- Connect a soaker hose to your rain barrel for watering garden plants
- Use rainwater for your indoor plants as well as it is soft and free from damaging minerals and chlorine
- Do not use collected water for drinking, cooking or bathing
- Join multiple barrels together for more storage
-The Alternative Daily

